Discover Quick, Delicious Recipes with Chef Ava – Your Personal Guide to Effortless Meal Prep!
Heavenly Soft Sourdough Sandwich Bread Made Easy at Home

How to Make Soft Sourdough Sandwich Bread at Home :
Table of Contents
Ever thought about making soft, fluffy sourdough sandwich bread at home? Imagine the smell of fresh bread in your house. And the joy of cutting into a loaf you made yourself. We’ll show you how to make perfect homemade sourdough sandwich bread. It’s sure to wow your family and friends.
Key Takeaways

- This recipe produces a soft, fluffy sourdough sandwich bread with a light texture and tight crumb.
- It uses all-purpose flour, olive oil, honey, salt, and an active bubbly sourdough starter.
- The total preparation time is around 24 hours, including bulk fermentation and proofing.
- Proper kneading techniques and monitoring of dough rise are crucial for achieving the perfect loaf.
- Baking temperature and timing guidelines ensure a golden brown crust and soft, delectable interior.
Understanding Sourdough Sandwich Bread Basics
Sourdough sandwich bread is a tasty and unique choice compared to regular bread. It uses a sourdough starter for leavening, giving it a tangy taste and better digestion. Learning about sourdough bread can help you make it at home.
What Makes Sourdough Sandwich Bread Different
Sourdough sandwich bread stands out because it’s leavened naturally. It doesn’t use commercial yeast. Instead, it uses a sourdough starter, a mix of wild yeast and bacteria. This natural process adds a unique flavor and improves the bread’s texture and nutrition.
Benefits of Making Homemade Sourdough
- Improved taste and texture compared to store-bought bread
- Enhanced nutritional value, including higher fiber and mineral content
- Better digestibility due to the natural fermentation process
- Longer shelf life and staling resistance
- Versatility in creating various bread types, from sandwich loaves to artisanal boules
Key Characteristics of Perfect Sandwich Bread
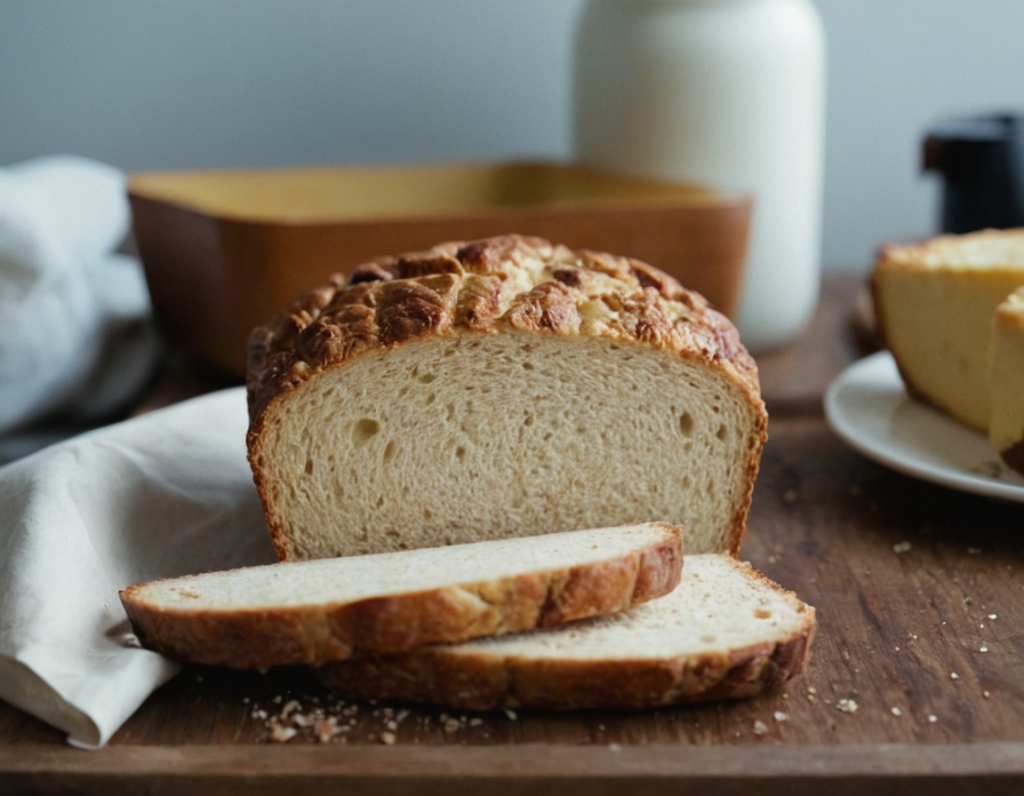
The ideal sourdough sandwich bread has a soft, airy crumb and a thin, crispy crust. This mix of texture and structure is key for making tasty and sturdy sandwiches.
| Characteristic | Ideal Attributes |
|---|---|
| Crumb | Soft, pillowy, and with an even distribution of small, irregular air pockets |
| Crust | Thin, crisp, and golden-brown in color |
| Structure | Able to hold the weight of sandwich fillings without collapsing or tearing |

Understanding sourdough sandwich bread’s unique qualities can help you bake this healthy and flavorful bread at home.
Essential Ingredients for Sourdough Sandwich Bread Recipe
Making the perfect sourdough sandwich bread at home needs the right ingredients. You’ll need unbleached all-purpose flour, warm water, and an active sourdough starter.
To make a soft and tasty sourdough sandwich loaf, you’ll need:
- Unbleached all-purpose flour (preferably King Arthur brand), which is the base of the dough.
- Warm water, around 80°F, to make the dough soft and activate the starter.
- An active sourdough starter, which gives the bread its tangy flavor and rise.
- Honey or maple syrup (for a vegan option) to add sweetness and balance the sourness.
- Light olive oil, which makes the bread soft and tender.
- Kosher salt, which adds flavor and controls the yeast.
The recipe calls for 500g of flour, 275g of warm water, 50g of sourdough starter, 60g of olive oil, and 10g of kosher salt. This mix ensures a soft, tasty, and beautiful loaf every time.
| Ingredient | Amount | Baker’s Percentage |
|---|---|---|
| Unbleached all-purpose flour (King Arthur) | 500g | 75.0% |
| Warm water (around 80°F) | 275g | 49.0% |
| Active sourdough starter | 50g | 1.1% |
| Honey (or maple syrup for vegan) | 60g | 4.0% |
| Light olive oil | 60g | 7.0% |
| Kosher salt | 10g | 1.8% |
By using these ingredients carefully, you’ll make a delicious sourdough sandwich bread. Your family and friends will love it.
Required Tools and Equipment
To make the perfect sourdough sandwich bread at home, you need some key tools and equipment. Some items are must-haves, while others are optional but can make the process easier.
Must-Have Baking Tools
- A 9×4″ loaf pan – This size pan is ideal for producing perfectly proportioned sandwich bread loaves.
- A Danish dough whisk – This unique tool helps incorporate ingredients and develop gluten without over-kneading the dough.
- A metal bench scraper – Invaluable for portioning, shaping, and handling the delicate sourdough dough.
Optional but Helpful Equipment
While not absolutely necessary, the following items can make your sourdough sandwich bread baking experience more efficient and enjoyable:
- A stand mixer – Powerful stand mixers like KitchenAid or Bosch can significantly ease the kneading process.
- A digital scale – Measuring ingredients by weight ensures precise and consistent results.
- A thermometer – Monitoring the internal temperature of the baked loaf helps achieve the perfect doneness.
- Plastic wrap or a shower cap – Useful for covering the dough during fermentation to prevent a skin from forming.
Bread Pan Specifications
For optimal sourdough sandwich bread results, it’s recommended to use a 9″ x 5″ loaf pan. This size ensures the dough has enough room to rise and develop a classic sandwich bread shape without overflowing the pan.
| Bread Pan Size | Ideal for |
|---|---|
| 9″ x 5″ | Sourdough sandwich bread |
With the right tools and equipment, you’ll be well on your way to baking delicious, bakery-quality sourdough sandwich bread right at home.
Preparing Your Active Sourdough Starter
So before you even begin to mix your sourdough sandwich bread, you will want to make sure your sourdough starter is nice and alive & bubbly. Its the secret to the ideal rise and flavour in your loaf! Feed the sourdough starter (at a ratio of 1:4:4 of starter, water, and flour) ~12 hours before you want to mix the dough.
If you want a slower overnight rise, leave the top in the 68–70°F range in the kitchen. If you require a more rapid activation, use the 1:1:1 ratio instead. Before adding your starter into your dough, ensure that it is bubbling and has grown in size. This is what provides your bread with the height and weirdly wonderful tastes within sourdough.
“A lively, bubbly sourdough starter is essential for making soft and flavorful sourdough sandwich bread right at home.”
Remember, the key to success is allowing your sourdough starter enough time to become fully active and bubbly before mixing your dough. This essential step will set you up for baking soft, tender sourdough sandwich bread that your family will love.
Step-by-Step Mixing and Kneading Process
Making the perfect sourdough sandwich bread starts with the dough. You need to mix and knead it right. This creates the gluten structure for a soft, fluffy crumb.
Initial Dough Formation
Start by mixing the ingredients in a stand mixer or bowl. Add water, sourdough starter, and honey first. Then, add bread flour and kosher salt slowly. Mix on low speed for about 2 minutes until it forms.
Proper Kneading Techniques
- Once the dough is formed, gradually add soft butter while mixing on speed 2. Knead the dough for 10 minutes until it turns smooth.
- During kneading, do “stretch and fold” moves to strengthen the dough. Grab the dough, stretch it up, and fold it back.
Visual Cues for Perfect Dough Consistency
Watch the dough as you knead. It should be shiny, smooth, and pull away from the bowl. When you stretch it, it should be thin and not tear. This means the gluten is developed, leading to a soft crumb.
| Ingredient | Quantity |
|---|---|
| Water | 240 grams (1 cup) |
| Active sourdough starter | 200 grams (¾ cup) |
| Honey | 42 grams (2 tablespoons) |
| Bread flour | 510 grams (4 ¼ cups) |
| Diamond Crystal Kosher Salt | 6 grams (2 teaspoons) |
| Soft butter | 60 grams (about 4 tablespoons or ½ stick) |
By using these sourdough kneading techniques and focusing on the dough consistency, you can make a soft, tasty sourdough sandwich bread at home.
Mastering the Bulk Fermentation Stage
The bulk fermentation stage is key in making sourdough bread. It’s when the dough ferments slowly, letting yeast and bacteria create tasty flavors and a chewy texture.
This stage usually lasts 10 to 12 hours at 68-72°F (20-22°C). The dough doubles in size, showing it’s fermenting well. But, temperature and humidity can change how long it takes.
Watching the dough closely is important during this stage. Doing “stretch and fold” every 30-60 minutes helps the dough. It also keeps the yeast and bacteria spread out and the dough at the right temperature.
| Dough Hydration | Recommended Bulk Fermentation Time |
|---|---|
| 65-70% Hydration (Basic Sourdough) | 2-5 hours |
| 80% Hydration (High Hydration Sourdough) | 4-6 hours |

Mastering the bulk fermentation stage brings out the best in your sourdough bread. You’ll get a soft, chewy crumb and rich flavors. The effort you put in here will make your homemade sourdough sandwich bread truly special.
Shaping Techniques for Sandwich Loaves
Making the perfect sourdough sandwich loaf at home is all about shaping the dough right. To get that classic rectangular shape, you need a careful method. This ensures your loaf is even and rises well. Let’s look at the key shaping techniques to turn your dough into a beautiful sandwich bread.
Creating the Perfect Rectangle
First, move your proofed dough to a floured surface. Use your hands to stretch it into a 9×12 inch rectangle. This size fits perfectly in a standard loaf pan.
Flour the dough lightly to stop it from sticking. But don’t overwork it, as this can harm its structure. You want to shape it gently, keeping the air pockets in.
Rolling and Sealing Methods
Now, roll your rectangular dough into a tight log. Roll it from one short end to the other, applying gentle pressure. Make sure to seal the seam and ends well to avoid air pockets.
Position the shaped loaf seam-side down in a greased loaf pan. This step helps the dough keep its shape and rise evenly. You’ll get a soft inside and a crispy outside.
Mastering sourdough shaping techniques for sandwich loaves is all about being gentle and precise. By following these steps, you’ll bake amazing sandwich loaf shaping at home. Savor the experience and delight in the delicious result!
Baking Temperature and Timing Guidelines
To get the perfect sourdough sandwich bread, watch the baking temperature and timing closely. Preheat your oven to 450°F (232°C). Then, lower it to 375°F (191°C) when you put the dough in. This method helps the bread rise and set well.
The baking time is approximately 45-50 minutes, depending on your oven and the size of the loaf. Look for a deep golden-brown crust. To make the crust soft, spray the loaf with water or use ice cubes in the oven.
When the bread hits 195°F (91°C) inside, take it out of the oven. Allow it to cool in the pan for 10-15 minutes before moving it to a wire rack. This step helps the bread cool down and keeps the crust soft. Follow these sourdough baking temperature and bread baking time tips for perfect loaves at home.
FAQ
What makes sourdough sandwich bread different?
Sourdough sandwich bread uses a sourdough starter for leavening. This gives it a tangy flavor and better digestibility than regular bread.
What are the benefits of making homemade sourdough bread?
Homemade sourdough is tastier, softer, and more nutritious than store-bought. It’s perfect for sandwiches because it’s soft, airy, and has a crispy crust.
What are the key characteristics of perfect sandwich bread?
The best sandwich bread is soft, airy, and has a crispy crust. It should also hold up well when used in sandwiches.
What are the essential ingredients for this sourdough sandwich bread recipe?
You’ll need unbleached all-purpose flour, warm water, active sourdough starter, honey or maple syrup, light olive oil, and kosher salt. The recipe calls for 500g flour, 275g water, 50g starter, 60g olive oil, and 10g salt.
What tools and equipment are required for this recipe?
You’ll need a 9×4″ loaf pan, Danish dough whisk, and metal bench scraper. A stand mixer is optional. You’ll also need a digital scale, thermometer, and plastic wrap or shower cap for covering the dough.
How do I prepare my active sourdough starter?
Feed your starter 12 hours before mixing the dough. Use a 1:4:4 ratio for a slow rise. For faster activation, use a 1:1:1 ratio. Make sure it’s active and bubbly before using it.
How do I properly mix and knead the dough?
Mix the ingredients in a stand mixer or by hand. Let the dough rest for 1 hour. Knead for 8-10 minutes until smooth and supple. Use stretch and fold techniques to develop gluten. The dough should be shiny and pull away from the bowl.
How do I master the bulk fermentation stage?
Bulk fermentation takes 10-12 hours at 68-72°F. The dough should double in size. Temperature and humidity affect fermentation time. Warmer climates ferment faster, while cooler climates take longer.
How do I properly shape the dough into a sandwich loaf?
Shape the dough into a 9×12″ rectangle. Roll it into a log, pinching the seam and ends. Place it seam-side down in the loaf pan. Let it proof for 10-12 hours, ideally overnight, until it rises about 1 inch above the pan.
What are the baking temperature and timing guidelines?
Preheat the oven to 450°F, then reduce to 375°F when baking. Bake for 45-50 minutes, or until the crust becomes golden.
. Create steam by spraying water and placing ice cubes in the oven.


